
Labour cost should not be discovered after the invoice arrives. Deploy Mint makes cost exposure visible before the shift is placed.
Hidden labour cost chaos starts when bookings, attendance, overtime, AWR uplift, shortfalls, buffers, pay rates and charge rates are all managed separately.
Deploy Mint helps Recruit Mint and employers move from reactive cost checking to clearer labour spend forecasting, booking recommendations, cost exposure and financial visibility.
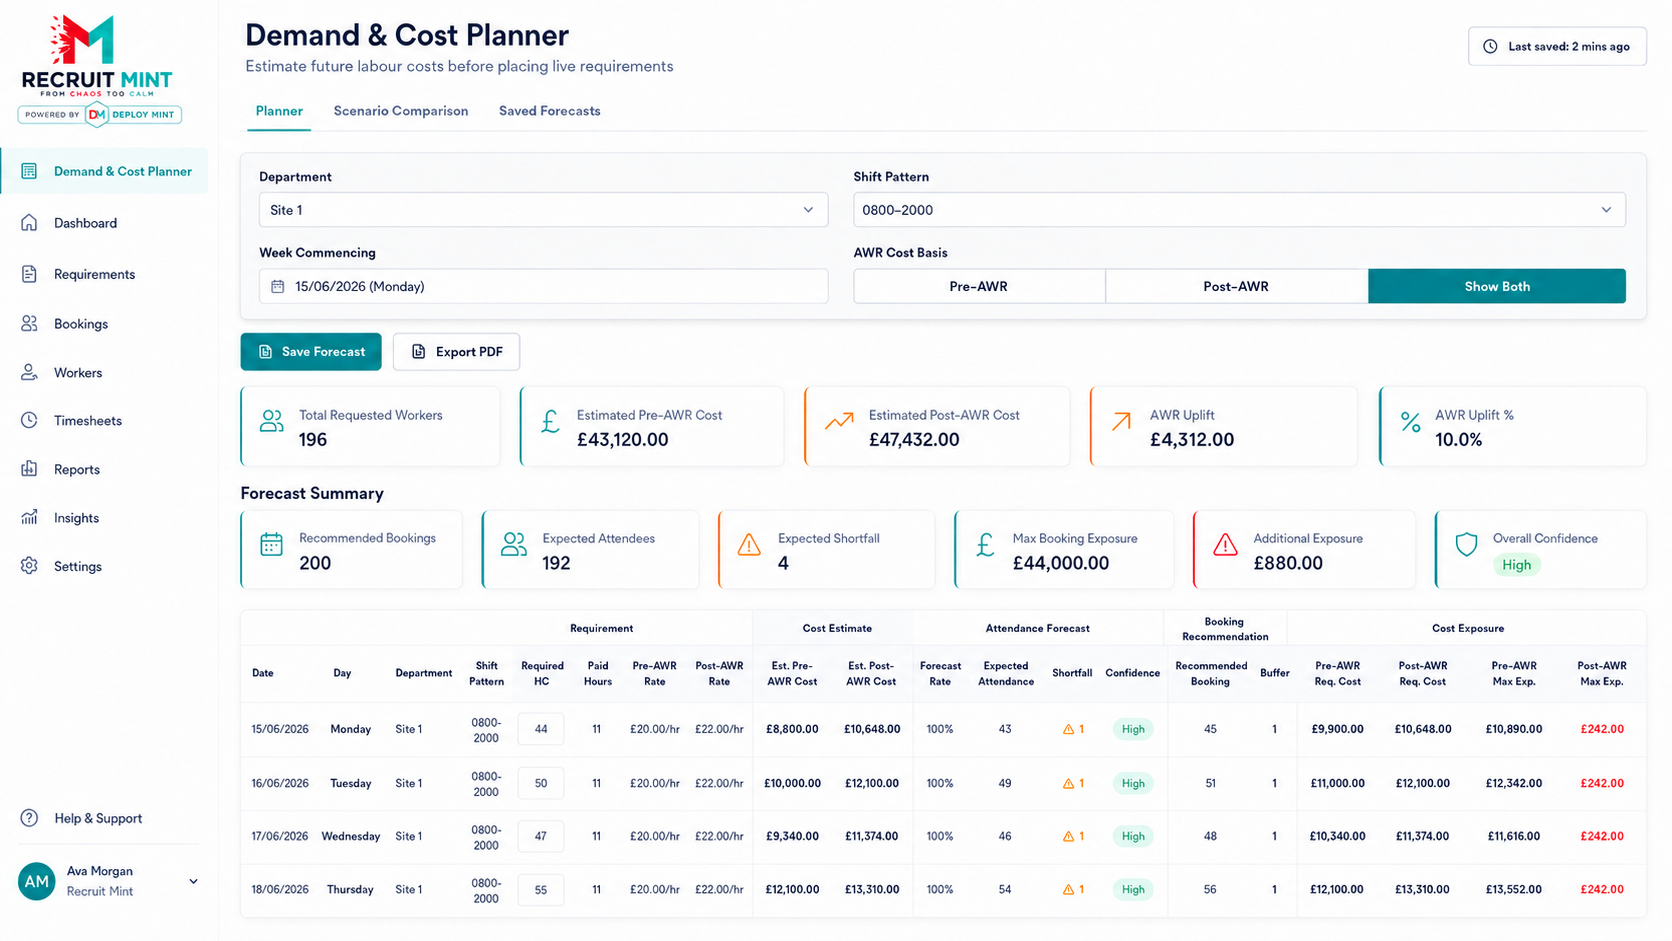
Forecast the cost before the labour is committed. Demand. Attendance. AWR. Exposure. Recommendation.
The Demand & Cost Planner gives employers and Recruit Mint a clearer view of requested workers, expected attendees, AWR cost impact, shortfall risk and maximum booking exposure before live requirements are placed.
Labour cost chaos happens when the plan and the financial exposure are disconnected. The shift may look covered, but the cost story is hidden.
Employers often know how many workers they need, but not always the cost impact of the booking decision. Overbooking, attendance risk, AWR uplift, additional exposure and shortfall buffers can all change the true labour cost.
Costs appear too late
Labour spend is often reviewed after the week has already happened, when the options to control it have gone.
AWR uplift is missed
Pre-AWR and post-AWR cost differences can create exposure if they are not visible in the plan.
Buffers add cost
Extra recommended bookings may protect attendance, but they also need clear cost visibility.
Shortfalls still happen
Even with spend committed, attendance risk can still leave the operation exposed.
When cost exposure is hidden, labour spend creeps up quietly.
The problem is not just the invoice total. It is the lack of visibility before decisions are made. Without a clear cost forecast, clients can overbook, underbook, miss AWR exposure or fail to understand the financial impact of recovery planning.
By the time finance, operations or payroll spot the problem, the labour has already been used.
Clients see the cost after the work has already happened instead of before the booking decision.
Extra workers may be requested without a clear view of financial impact.
Post-AWR uplift can increase cost when not planned into the requirement.
Operations, finance and recruitment teams work from different versions of the cost position.
Deploy Mint connects demand planning with labour cost exposure. So the numbers make sense before the booking is placed.
The Demand & Cost Planner helps teams estimate worker requirements, expected attendance, pay cost, charge cost, booking buffers and AWR uplift before live requirements are confirmed.
Total Requested Workers
See the planned labour requirement before committing the workforce.
Expected Attendees
Compare the requirement with forecast attendance to understand likely shortfall.
Pre & Post-AWR Cost
View cost estimates across pre-AWR and post-AWR workers before the shift is booked.
AWR Uplift Visibility
Make the uplift cost and percentage easier to understand before it becomes hidden spend.
Booking Recommendation
Use recommended bookings and buffers to balance operational cover against financial exposure.
Cost Exposure
See maximum exposure and additional exposure before the booking decision is made.
Cost control improves when labour spend is forecast early. Not discovered later.
Deploy Mint helps turn labour requirements into a clearer financial planning process.
The workforce is planned manually
Requirements, attendance risk, AWR uplift and booking buffers are considered separately.
The true cost appears later
Labour spend, uplift, exposure and invoice totals become clear only after the work is done.
Cost exposure is visible early
The plan shows demand, attendance forecast, recommended bookings and financial exposure together.
Better cost visibility creates better labour decisions. And fewer invoice surprises.
The value is control. When employers can see the financial impact of workforce planning before the shift is placed, they can make better decisions around bookings, buffers, attendance risk and AWR exposure.
Understand estimated labour cost before live requirements are placed.
See uplift and post-AWR exposure more clearly in the planning stage.
Spot additional exposure before it quietly becomes part of the invoice.
Give operations and finance a clearer view of why bookings are recommended.
Let’s make labour spend visible before it becomes a surprise.
Book a workforce review and we’ll help identify where demand planning, cost forecasting, AWR uplift, booking exposure or invoice visibility could be improved.